RELEASE 8-10-2021 @ 4:30AM PDT - PCS 2.0 Prerelease Deployment
Party Center Software 2.0 Prerelease
Party Center Software Release Notes 8.0.0.1
Party Center Software 2.0 is here and we are excited to show you around! We've added some new features, upgraded existing features, and redesigned several pages. We also understand how jarring new page layouts and workflows can be. This is why we are giving you time to transition and get familiar with PCS 2.0 before sunsetting the pages that have been replaced. You can enable PCS 2.0 at any time, but we encourage you to enable it and leave it on. These release notes outline the changes but we've also created a series of videos to quickly get you up to speed on Party Center Software 2.0.
Party Center Software 2.0 Help Center Article
With the addition of new features, new settings and options are now available. Included in this section are details on how you can turn on PCS 2.0, set the Required Customer Fields for 2.0 profiles, alter waiver settings, and change the Guest of Honor requirements for parties.
Enabling Party Center Software 2.0
You can turn on Party Center Software 2.0 by navigating to Admin -> Facility Info -> Preferences. Once you are on the preferences tab, scroll to the bottom of the page and you will see the option in the image below to enabled 2.0. Once you check the checkbox and save, 2.0 will be enabled for all users. You can toggle the option on or off, but we recommend leaving 2.0 on. You may run into unexpected issues if you enable and disable 2.0 throughout the day.

Required Customer Fields
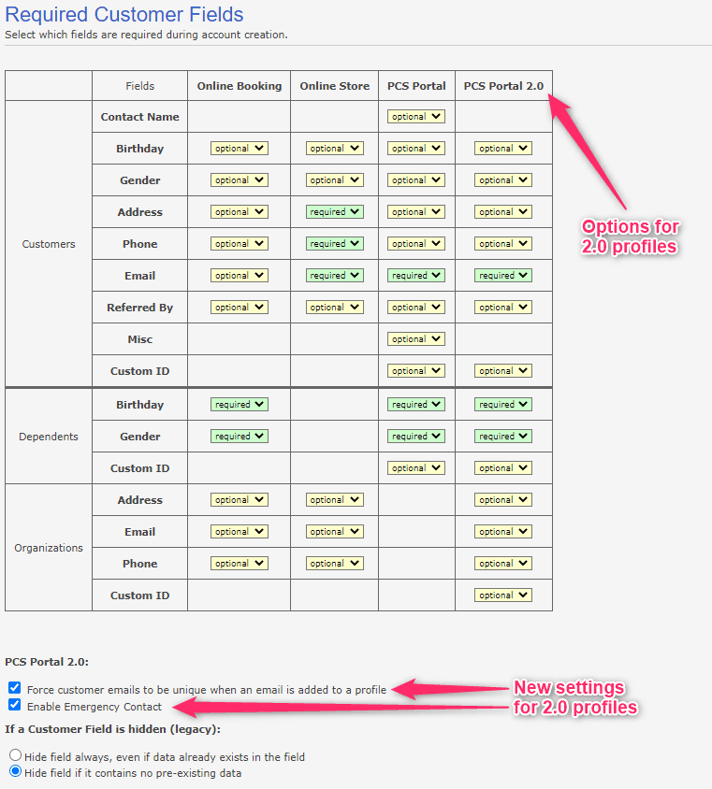
We've created a new section for 2.0 profiles on the Required Customer Fields page where you can control the profile requirements for Customers, Dependents, and Organizations. There are also new options at the bottom of the page for "Force customer emails to be unique when an email is added to a profile" and "Enable Emergency Contact."
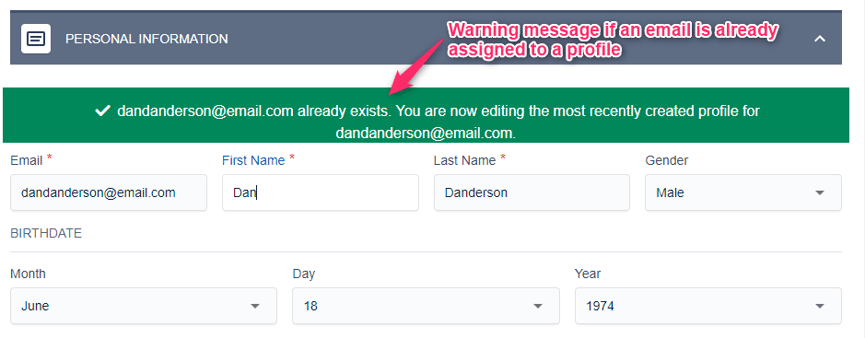
If you enable the option "Force customer emails to be unique when an email is added to a profile" you won't be able to create duplicate customer profiles with the same email address. If you attempt to create a new customer profile with an email address that is already assigned to an active profile, the existing profile will be automatically loaded and a warning message will be displayed to the user.
Waiver Settings
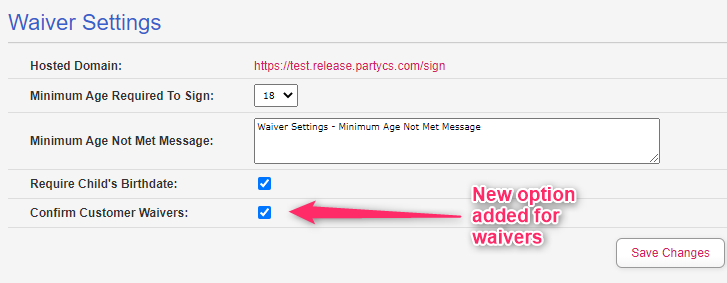
We've added a new option for waivers that removes the need to manually confirm a waiver. If the "Confirm Customer Waivers" option is disabled, waivers will be displayed with a green checkmark throughout the 2.0 pages after signing. If the option is enabled, waivers will need to be manually reviewed and "confirmed" before displaying the green checkmark.
Party Option for Guest of Honor
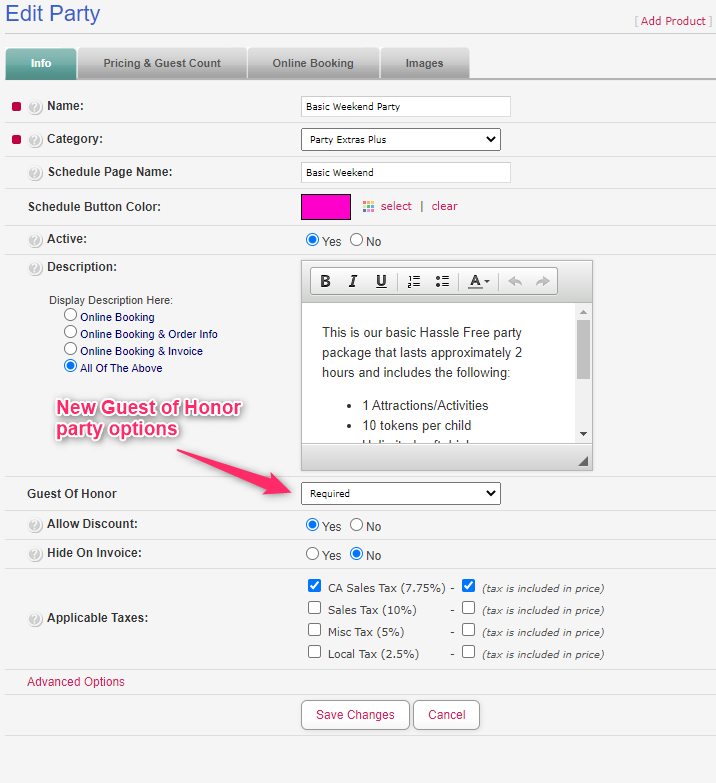
A new option has been added to Parties and Party Packages that lets you set the Guest of Honor to Required, Optional, or None. If a party is set to Optional, guests have the option to add a Guest of Honor but they can complete a booking without a Guest of Honor. If a party is set to Required, a Guest of Honor must be added before a booking can be completed. If a party is set to None, the Guest of Honor selection screen will not be displayed during an online booking. The party options for Guest of Honor are also enforced with completing an In House Booking.
The customer page and all subsequent pages have been completely redesigned. The new 2.0 customer page includes a high-performance search, expandable views, profile images, new filter options, and sortable columns. For a complete overview of the 2.0 customer page, we encourage you to visit the Party Center Software 2.0 Help Center article.
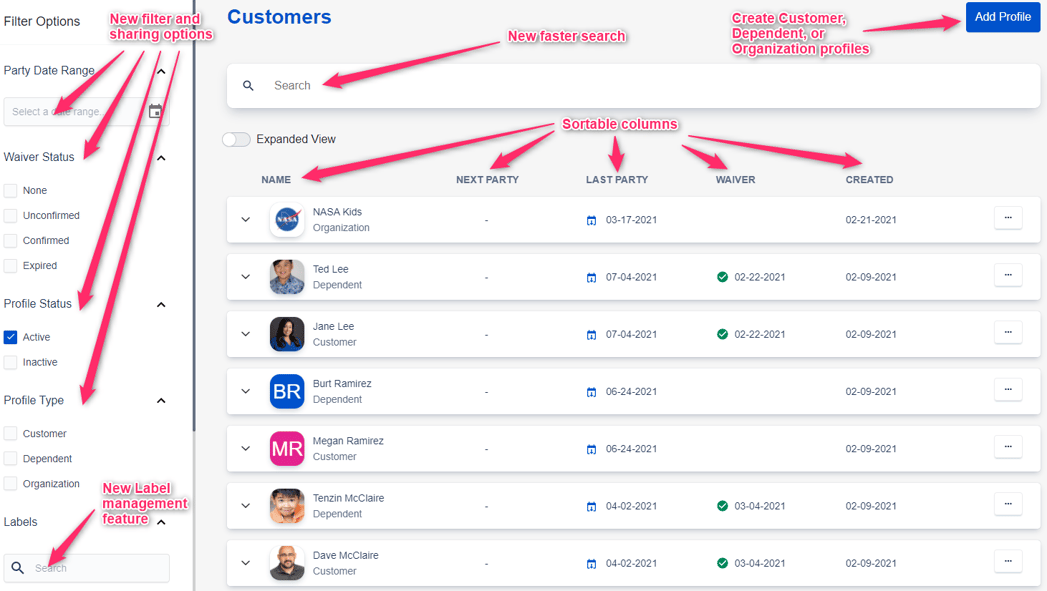
Search
You can complete a partial or full tex search for Phone Numbers, Emails, Custom IDs, or Names. Unique IDs can also be swiped or scanned into the search bar to immediately search for matching results.
Filters and Sharing Search Results
At the top of the Customer page under Filter Options, you can choose to reset filters or share search results. If you select "Share Search Results," the URL will be copied to your clipboard so you can immediately share the exact filters and results for others to view.

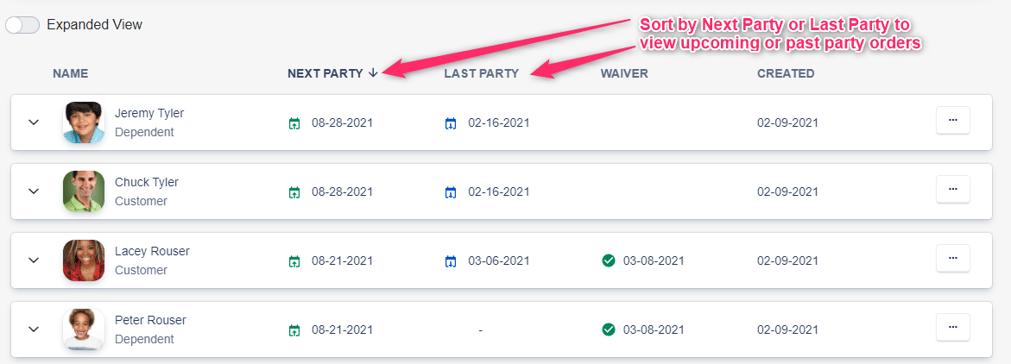
Next Party & Last Party
Use the Next Party and Last Party columns to easily see upcoming or past parties. Clicking on the party date will take you directly to the order. Both the booking customer and the guest of honor will display a link to the party order.
Waiver Icons
We've added new icons to easily identify the status of a waiver. The green checkmark displays a waiver that has been confirmed or signed . The yellow exclamation mark identifies a waiver that needs to be confirmed
  , while the red icon identifies a waiver that has expired
  .
.
Open POS Order
You can now open a Point of Sale order directly from the Customer page. Click the three-dotted icon on any customer profile and select "Open POS Order" to be redirected to the Point of Sale with the customer already selected.

Organizations
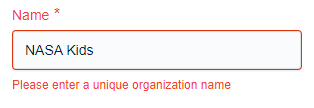
Organization names are now unique per location. Any number of customers or dependents can be associated with a single organization. This will allow users to easily identify everyone who is associated with a single organization. If a user tries to create an organization that already exists an error message will be displayed. The user can then search for the existing organization and associated it with the customer or dependent.
Labels
Labels have been added as a new way to categorize profiles. You can create, assign, or manage labels from within any customer or dependent profile. You can also filter profiles by Labels on the Customer page. If you used a "Custom Status" on a classic Customer profile, those custom statuses have been migrated to Labels in the 2.0 system. You can see all of your labels on the Customer page in the filters menu.
Classic Customer profile custom status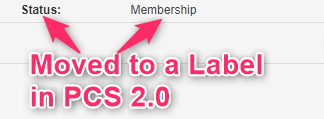
Filter by labels on the 2.0 Customer page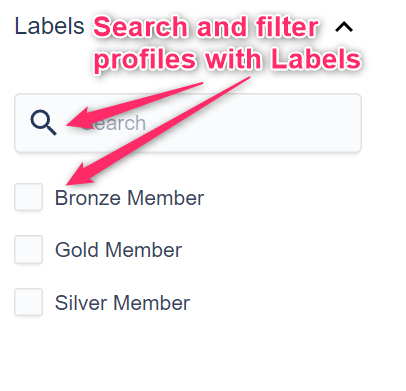
Add an existing Label to a profile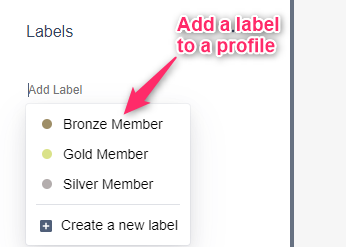
Manage Labels through this icon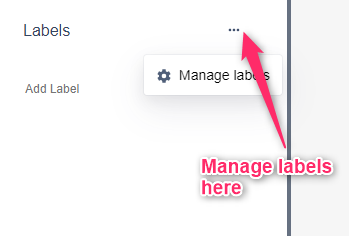
Create and manage existing labels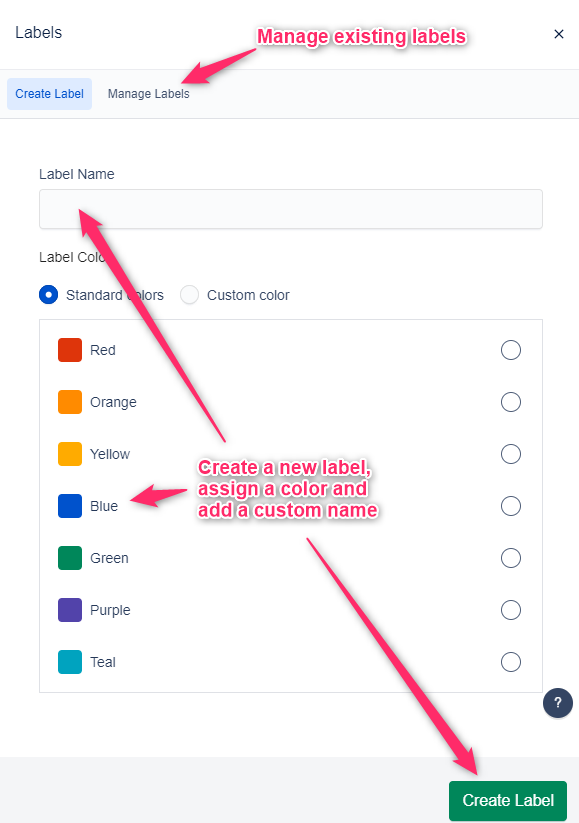
Customer IDs
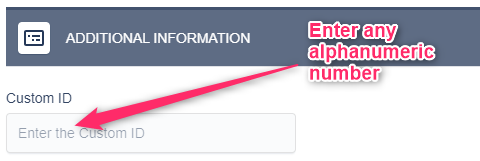
The profile field Unique ID has been replaced with Custom ID. The Custom ID field will accept alphanumeric characters. Once a Custom ID has been added to a profile you can search for the Custom ID on the Customer page.
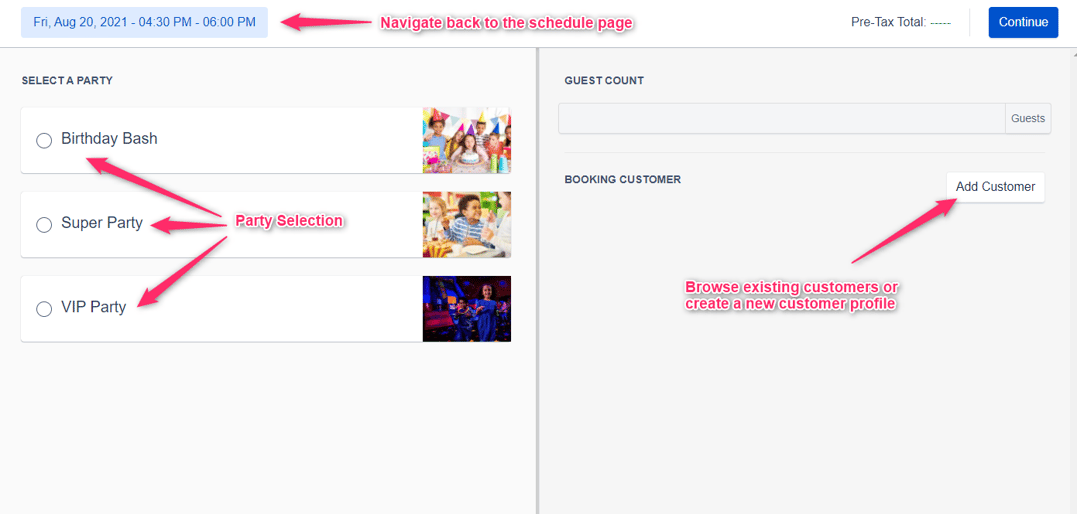
We've redesigned the In House Booking process and consolidated all of the party options into a single page. After selecting a schedule slot from the Schedule Page, you will be redirected to the 2.0 In House Booking Party Selection page where all of the options for the party can be configured.
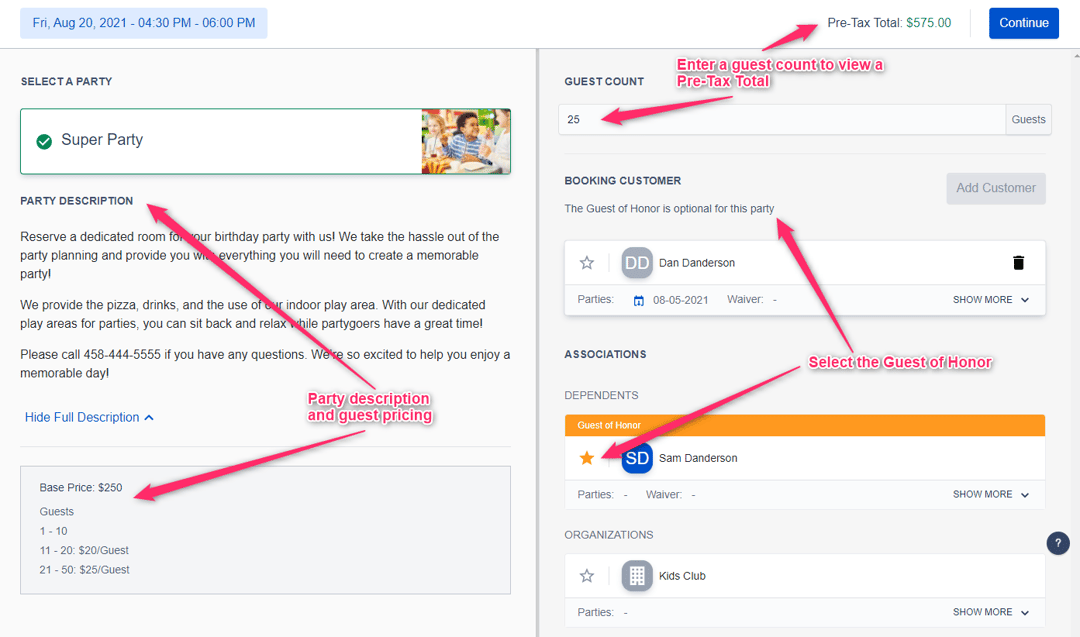
After a party is selected you can view the party description, pricing information for the party, add a Booking Customer, select a Guest of Honor, and view the Pre-Tax Total. After clicking "Continue" the order will be created and you will be redirected to the order page for that order.
Waivers are now automatically emailed to the customer after a waiver is signed. As long as the customer profile contains an email address, a PDF of the waiver will be emailed to the user. We've also improved the waiver expiration process. If profile information for a customer or dependent is used in a waiver, the waiver will automatically expire if the profile information is altered. Extra validation has been added to ensure everyone who signs a waiver meets the "Minimum Age Required To Sign."
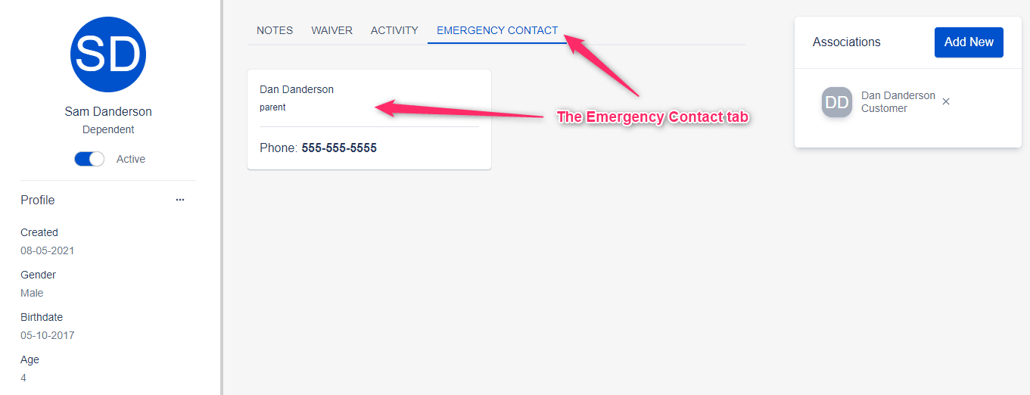
If you enable the "Enable Emergency Contact" option on the Required Customer Fields page, the Emergency Contact tab is displayed on the dependent's profile.
Party Center Software is a web-based application and has always been able to run in a web browser. However, a special browser was required in order to allow Party Center Software to communicate with physical hardware. This browser was called PCS Register, and it allowed the use of peripherals such as a cash drawer or a receipt printer.
As technology evolved, PCS Register and its many legacy software requirements became increasingly difficult to maintain. Supporting compatibility with PCS Register began to preclude the Party Center Software development team from adopting many new technologies that were becoming industry standard.
This led to the decision to develop a new method of allowing Party Center Software to communicate with local hardware. This new method is called Hardware Link. With Hardware Link installed, you no longer need to use a special browser and can communicate with your hardware through Party Center Software using a standard browser such as Edge, Chrome, or Firefox. Please follow the link below for a complete guide on installing and using Hardware Link.
Hardware Link Help Center Article
Party Center Software 2.0 Prerelease
Party Center Software Release Notes 6.0
Party Center Software Release Notes 3.0
Be the first to know about new articles, insights, and tips to help you grow your family entertainment business.